• Free Ground Shipping on all Orders over $99
  • Welcome

Call Us 407.925.2298

How to Use Electric Confetti Cannon

Your Guide to Using Electric Confetti Cannons

At R&B Confetti, we're more than just confetti cannons. We craft memories. Let's walk through how to use our electric confetti cannons to create spectacular and joyful moments.

Electric Confetti Cannon

Preparing Your Electric Confetti Cannon

Our premium confetti and streamer sleeves are designed to maximize the visual impact of your electric confetti cannon.

Understanding the Effects:

  • Confetti shoots over 35 feet high, creating a wide, shimmering cloud.
  • Streamers soar over 65 feet, unfurling in a dramatic "V" pattern for a majestic effect.

Loading the Confetti or Streamers:

  1. Carefully cut open one end of the plastic sleeve.
  2. Slide the opened end of the sleeve into the confetti cannon barrel.
  3. Loading Method 1 (Drop): While holding the barrel upright, drop the confetti or streamers directly into the sleeve.
  4. Loading Method 2 (Slide): Alternatively, carefully pull the sleeve out of the barrel while simultaneously sliding the confetti or streamers into the barrel.
  5. Completely remove the plastic sleeve.
Cut the end of the sleeve open.
Slide the open end of the sleeve into the barrel.
Take hold of the plastic sleeve.
Push the confetti or streamers into the barrel.

Compression Cap Installation:

  1. Cap Placement: Position the compression cap over the open end of the barrel.
  2. Tape Application: Secure the cap by tightly wrapping black compression tape around the seam where the cap meets the barrel.
  3. Seal Formation: Firmly press and rub your thumb along the tape to create a complete and airtight seal. This creates a mini pressure chamber, maximizing launch distance.
  4. Content Retention: The cap and tape assembly also effectively retains the confetti or streamers within the barrel until firing.
Place compression cap onto the end of the barrel.
Use compression tape to secure the compression cap.
Rub the tape with your thumb to get a good seal.

CO2 Cartridge Installation:

  1. Verify Valve Closure: Ensure the piercing unit valve is fully closed. (Refer to the provided image for visual guidance.)
  2. Secure Grip: Firmly grasp the piercing unit in one hand.
  3. Rapid Cartridge Insertion: Quickly screw a threaded CO2 cartridge into the piercing unit until it is securely tightened.
  4. Complete Piercing: Continue tightening until the cartridge is fully pierced. A distinct sound or slight resistance may indicate successful piercing.
  5. Optimal Performance: Full piercing is essential for consistent and powerful CO2 flow, ensuring a successful confetti shot.
Loading the CO2 cartridge.

Confetti Cannon Setup:

  1. Preparation: Ensure the CO2 cartridge is installed and the barrel is loaded.
  2. Electrical Connection: With the power source OFF, connect the confetti cannon to your controllable 110V electrical outlet.
  3. Piercing Unit Connection: Securely attach the piercing unit to the quick-connect fitting.
  4. CO2 Charging: Slowly open the valve on the piercing unit. You will hear the CO2 filling the cannon.
  5. Barrel Attachment: Securely attach the loaded barrel to the quick-connect fitting.
  6. Safety Cable Attachment: Connect the safety cable from the unit to the barrel.
Connect the piercing unit to the confetti cannon.
Connect the loaded barrel to the confetti cannon.
Connect the safety cable to the barrel.
Adjust the barrel to the perfect angle.

Confetti Cannon Operation:

  1. Angle Adjustment: Adjust the barrel to achieve the desired angle for optimal confetti or streamer projection. (Refer to the provided image for visual guidance.)
  2. Ready to Fire: Your electric confetti cannon is now loaded and charged, prepared for immediate firing.
  3. Firing Duration: Activate the power switch for a minimum of 5-6 seconds to ensure a complete and powerful launch. Note: While the cannon fires instantly upon activation, a sustained power supply is crucial for optimal performance.

Important Safety Instructions:

  • No Aiming at Persons: Under no circumstances should the confetti cannon be aimed at any individual.
  • Constant Supervision: Never leave the confetti cannon unattended while it is charged or connected to a power source.
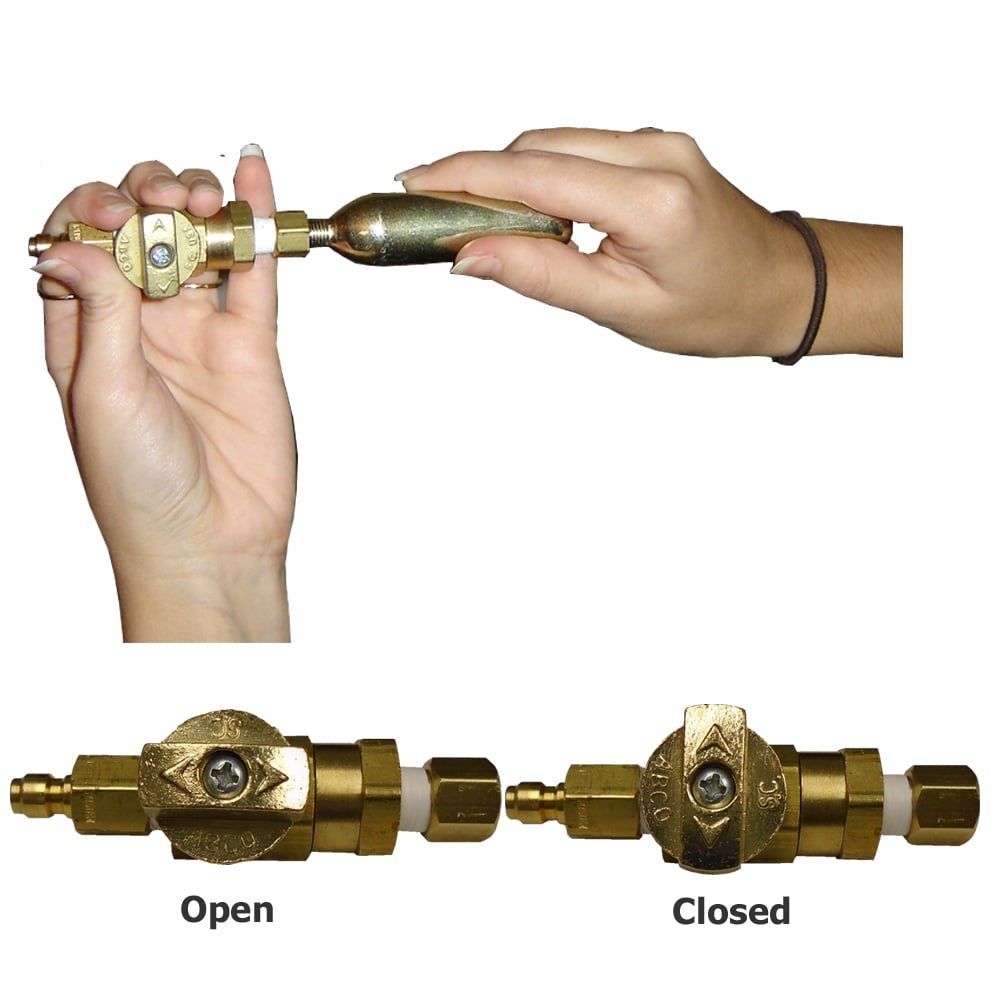
  • CO2 Cylinder Handling: Exercise extreme caution when handling CO2 cylinders.
  • Temperature Hazard: Be aware that CO2 cylinders become extremely cold during use and can cause frostbite.
  • CO2 Bleed Procedure: Always bleed off any remaining CO2 pressure after firing the cannon and before attempting to remove the piercing unit.
  • Critical Safety Precaution: Failure to bleed the CO2 can result in serious injury and damage to the cannon, including o-ring failure.

Getting the Best Confetti Shot

Optimal Distance:

  • Place the confetti cannon 15-25 feet away from the desired coverage area.
  • The bulk of the confetti will cover the area between 25 and 35 feet out.
  • The confetti will spread wide as it floats.

Enhancing the Effect:

  • For the best visual impact, use confetti cannons on either side of the target area. This will create a breathtaking and captivating effect.

Getting the Best Streamer Shot

Optimal Distance:

  • Place the confetti cannon about 30 feet away from the desired coverage area.
  • The Streamers will blast out and spread wide.

Enhancing the Effect:

  • For the best visual impact, use electric cannons on either side of the target area to have the streamers fly from both sides. This will create a grand and dramatic effect.

Let the Fun Fly!

We're here to help you create unforgettable moments with our wonderful confetti cannons. Our friendly and approachable team is ready to assist you with any questions or concerns.